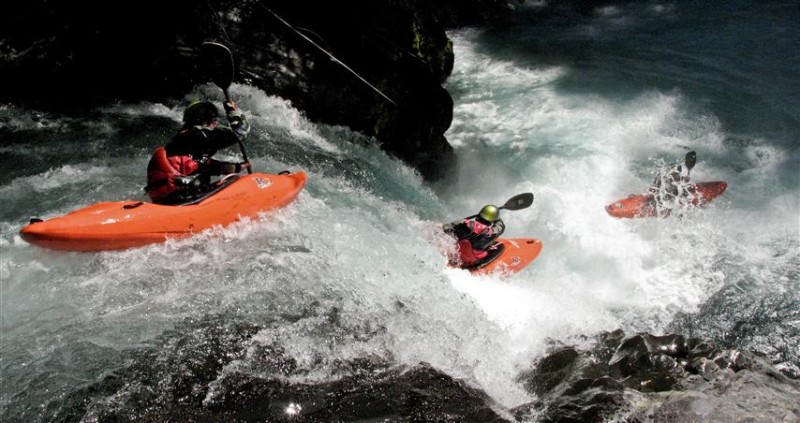
So you are wondering how to combine a series or sequence of successive shots into one. How do you do this? Read on…
They are done in Photoshop. Here is what I do:
1. Open Adobe Bridge (comes with Photoshop). Highlight the desired photos, right click, open (alternatively, you could open each photo in Windows Explorer manually by right clicking each image and saying Open With -> Photoshop)
2. In PhotoShop, go to Window -> Arrange -> Tile
3. Now that your images are “tiled” in front of you, choose which image you want to drag the other ones into (lets say the one on the top left).
4. With the Move Tool (the black arrow), open your layers palette, and drag the “Background” layer from each photo to the upper left window/photo. This automatically lines the image up on top of the original/background and makes it super simple. Repeat this step for all of your images.
5. Now that your images are all in the same document, close the ones you don’t need anymore.
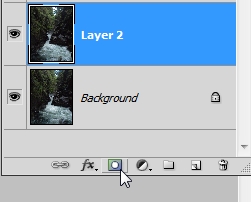
6. Now the tricky part: We have to tell Photoshop what to show on each layer (now, each layer is stacked on top of each other, and we cannot see each photo, only the top photo/layer). We are going to enable Photoshop to show only the paddler in each photo (minus the lowest level layer, likely called “Background”). We are going to do this by using layer masks. SO, select the layer you want to edit, then click the following button in the layers palette:
7. Press the letter “D” on your keyboard. This resets your colors to the defaults (black and white).
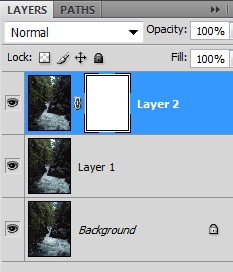
8. Click on the layer mask / white box. Make sure it’s highlighted. It should look like this:
9. Make a note of where the paddler is (I usually place my cursor over the paddler at this point).
10. On your keyboard, hit Control + Backspace ( Command + Backspace on the Mac). This fills the layer mask with black and will make the current layer invisible. Don’t worry, this is what we want.
11. On your keyboard, hit the letter “B” for brush.
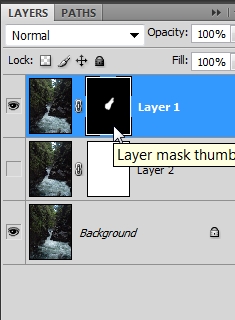
12. “Paint” over where the paddler used to be (the foreground color should automatically be white). The paddler will magically appear. (Note: As you paint, look at what your mask is doing. Black is turning to white to reveal what is on that layer. Pure magic it is).

Notice the white in the middle. That is from our brush tool. It reveals only that part of this particular layer.
13. Repeat steps 6-12 for each layer. Now that you have done the first one, the following layers should be a breeze.
TIP: You can edit the opacity and size of your brush at the top of your window. You can also zoom in or even move the layer with the move tool to line it up better (since your boating buddies likely moved the camera when they took the shots. Imbeciles!) .
14. Once you are satisfied with what you see, go to File -> Save as… -> yourfilename.psd . NOTE: Be SURE to check “As a Copy” so you don’t write over your original image. Also, make sure to save a PSD so you can edit it later.
15. You are undoubtedly going to want a jpg right? Do the same steps as in step 14, but select .jpg instead of Photoshop PSD.
DONE. Well made. Your first whitewater photo compilation. How do you feel?
If you feel something needs to be clarified, please let me know in the comments section and I will update this post.
Happy Photoshopping,
-Adam Johnson


 The Rio Desahue is another one of Pucon’s classic whitewater runs. The river runs via the overflow from a lake just upstream of the put-in. …
 Have you ever wondered how to pack your breakdown paddle in your kayak? Have you ever swam and lost things out of the back of …